DIY Stone Coasters
This craft is a great go-to gift for any occasion or person - volunteer gifts, teacher gifts, house warming gifts, bridal showers, birthdays, anything! These are stone coasters made with decorative napkins and take very little time to make.
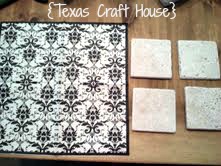
Here are my materials. Stone tiles that you can get from Home Depot or Lowes. Mine came from Home Depot in a pack of 9 for about $3.97 each. Then I grabbed some cute napkins from Hobby Lobby for $3.00 after using a coupon. You don't need many napkins, one napkin covers 4 tiles so one pack is more than enough. I already had Mod-Podge and a paintbrush.
Feel free to use my Amazon suggested links below: {I am an Amazon affiliate which means if you purchase anything from my lists, I will get a tiny portion back. I only include things I personally have purchased and love!!!}
Supplies:
- Stone Tiles
- Mod Podge
- Decorative Napkins
- Paint Brush
Below is a view of what the stone tile looks like. It took me a minute to find them in the tile section. Just remember to look for the stone. It's bumpy and slightly chalky, comes in a small pack and kinda heavy. Perfect for this craft.
I pulled out 4 tiles to use for my first coaster set and laid them out.
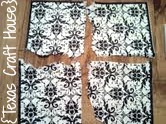
Then I laid my napkin all the way out after unfolding it. Here you can see how one napkin is more than enough for four coasters.
Next, I tore the napkin along the fold. The messier the tear the better the coaster will look. Good thing perfection is not important for this craft.
Then, I dipped my brush in the Mod-Podge and brushed it on the tile very liberally.
I took a piece of the napkin I had tore and laid it on top of the tile. I pressed my palm down on the napkin with one hand and with the other tore the napkin along the edge of the coaster to fit the size. Again, the messier the tear the better it will look.
After tearing the napkin to the size of the coaster I coated the top of the napkin with more Mod-Podge to seal the napkin on. I made sure to go along the sides and edges to press down any small pieces of napkin to the coaster.
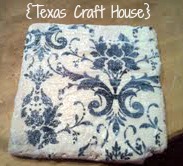
Here is what it looks like after I Mod-Podged the napkin onto the coaster.
Here is a set of coasters drying. I let them dry over night just to make sure they were ready to go before touching them again.
Here are the same four coasters drying. The picture doesn't do them justice. There is a slight sheen from the Mod Podge and it looks really neat and 'antique-y'/shabby chic.
Here is one complete gift. I did this craft in about 15 minutes. Just tear, glue, dry.
Then of course I had to adorn it with some matching floral ribbon (raffia) and a little tag that says "Enjoy your homemade coasters!" I also have a little matching thank you note (mine were a thank you gift) with a handwritten message on the inside.
At the end of the school year my coworker, Megan, was showing me what she uses for her end-of the year parent volunteer gifts. She told me the simple steps, I tried them, and they turned out perfect. I loved them and so did my parents. Several that I gave these too even asked if I had painted them by hand! If you use a napkin that has a white/cream colored background that matches the stone it goes clear and the design really stands out. They are always so surprised when I tell them how I did it.
You could play around with so many different looks with all the different napkin options. Places like Party City would have a ton of napkin designs to choose from, too. You could also do solid colors, other designs, anything. I want to make these using Vera Bradley napkins sometime, soon. I would keep those for myself for the patio table outside.
Do you have a go-to homemade gift?


Hello!
I am so excited to have found your pin…I made these several years ago with Mod Podge and images that I printed from the internet. I LOVE your idea of using cool napkins for your coasters. What a great idea! Thanks so much for this! Take good care…I am following you now!
Linda :o)